Run jobs
Setup your first job
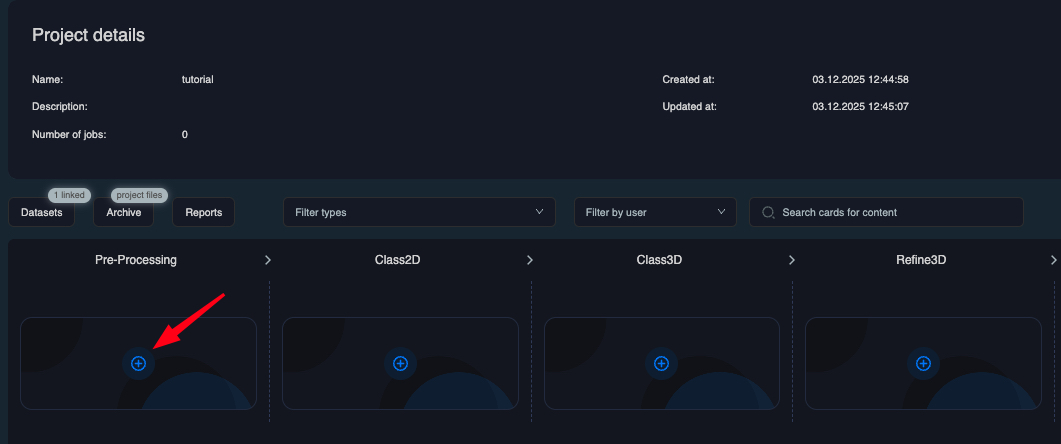
To setup your first job, click on the respective column in the 2D grid: if you want to process movies, you will likely want to start a MotionCor job which you can find in the Pre-processing column. For uploaded particles, you can start a Class2D job in the Class2D column. Add a job of the desired type by hovering over the grid and clicking the "+". you will be prompted to select a JobType and can select one of your linked datasets as the input source. Confirm your selection by clicking Setup job, and the job will then be displayed as a tile.
Job view
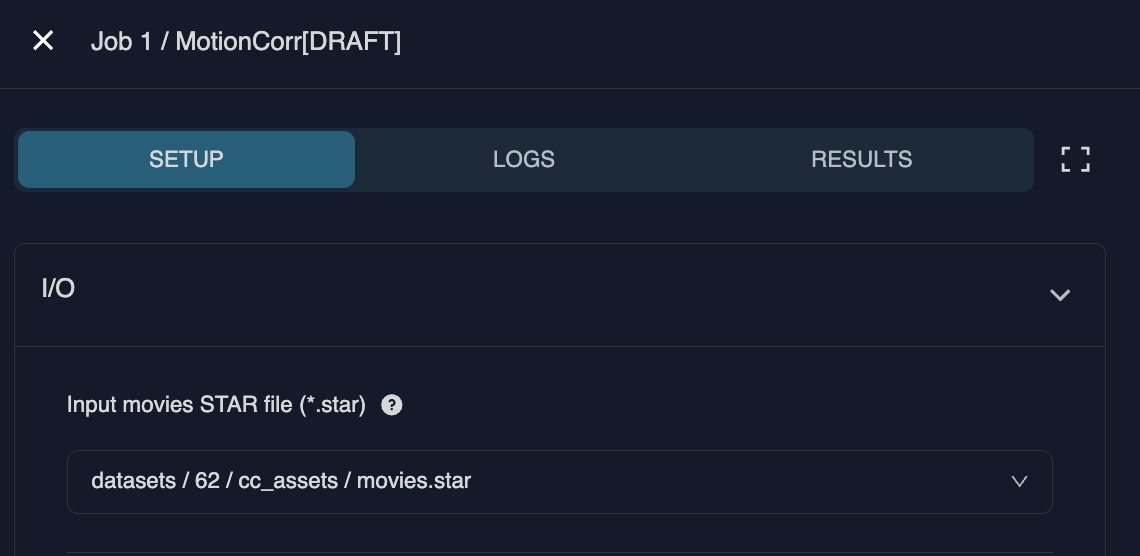
Clicking on the tile will present you the job view. The Job view is divided into 3 main tabs: Setup, Monitoring and Results which are displayed at the top. Once active, these can be toggled by clicking on the setup, status or results titles, or, in the expanded view, by clicking the arrows at the top of the screen.
Specify parameters
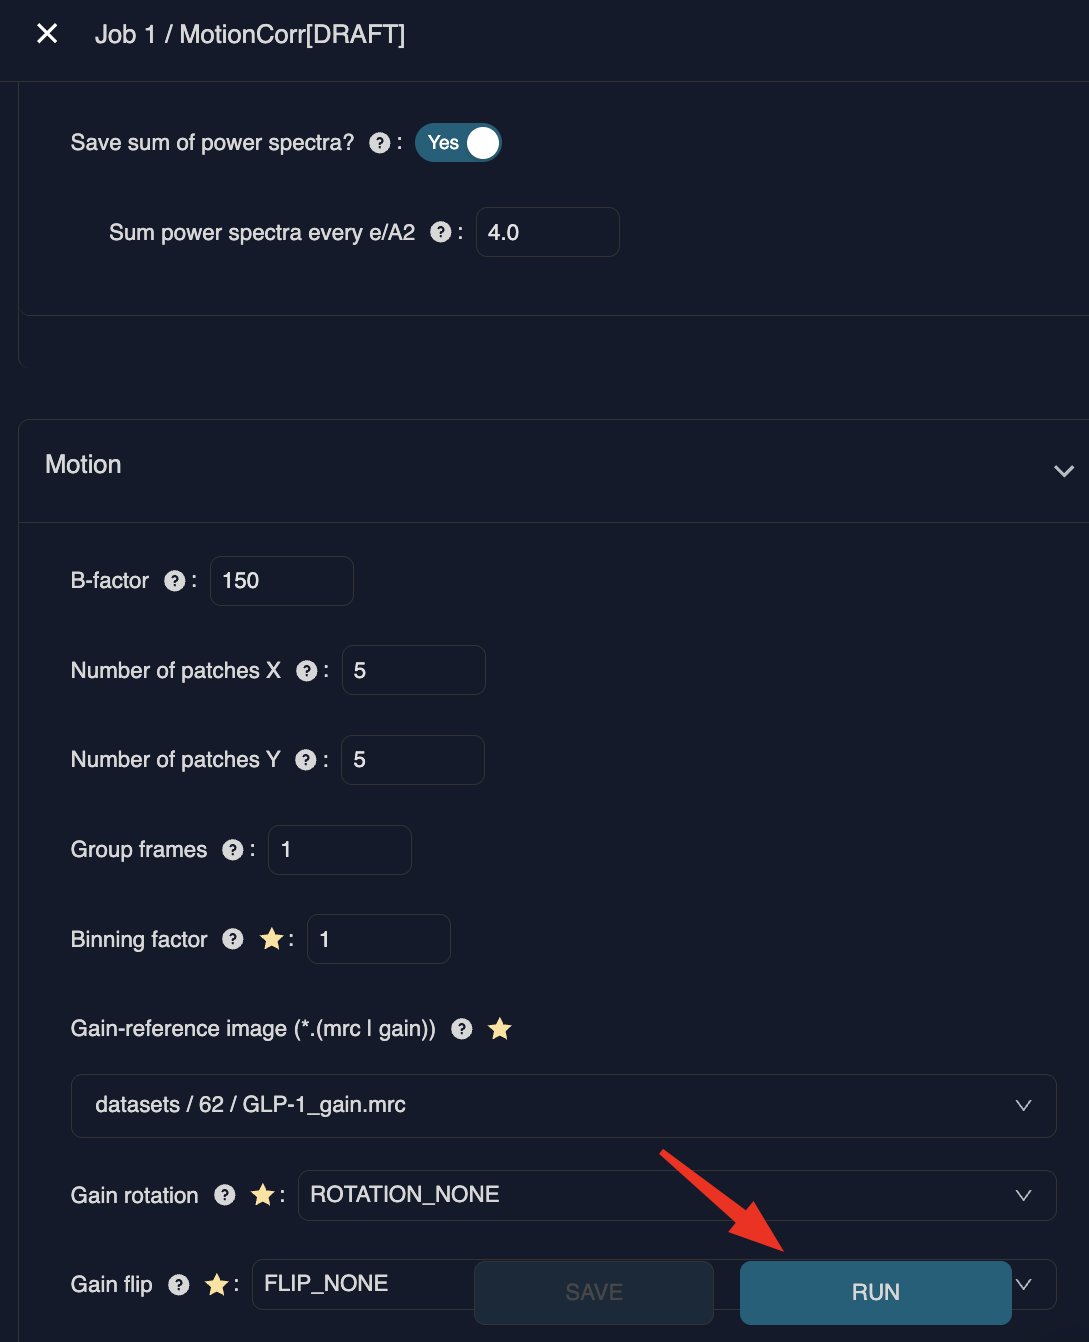
Specify the parameters within the Setup tab. Once you have specified all parameters, click Save to save your job draft.
If you missed a required parameter, a warning will be displayed at the bottom highlighting which input is still required.
Careful: If you get a warning, the job is not yet saved!
After saving, you can change parameters by simply adjusting them and clicking Update at the bottom.
Run your first job
Once you have confirmed your parameters by clicking save, you can start the job by clicking Run Job at the bottom right. This will scroll the page up and update the status of the Monitoring tab. Once the job starts, the Job view will automatically switch to the monitoring tab.
Monitoring jobs
The monitoring tab will display the log of the running job. You can always leave this job and check the results later The respective job tile in the project overview will indicate the status of the job.
Inspecting results
After a job is finished, the job will automatically switch to the results tab. You can inspect the files in the fileviewer and trigger their download to your device by clicking on them. In particular the logfile.pdf can be useful to check some of your results.
For particle picking jobs such as CryoCloud Picker, you can inspect the picked coordinates on their respective micrographs. For 3D refinement or classification jobs, it is possible to view slices and 3D volumes within the results tab. However, downloading the maps to your local device is useful where you want to compare or manipulate volumes e.g. using Chimera. For more information visit Inspect Results
Run subsequent jobs
As with your first job, hover over the job grid in the project overview and click on "+" to add a new job. This time, select a previous job as the input source rather than the dataset. The new job will then be displayed under its parent job, and subsequent jobs will be connected by arrows.